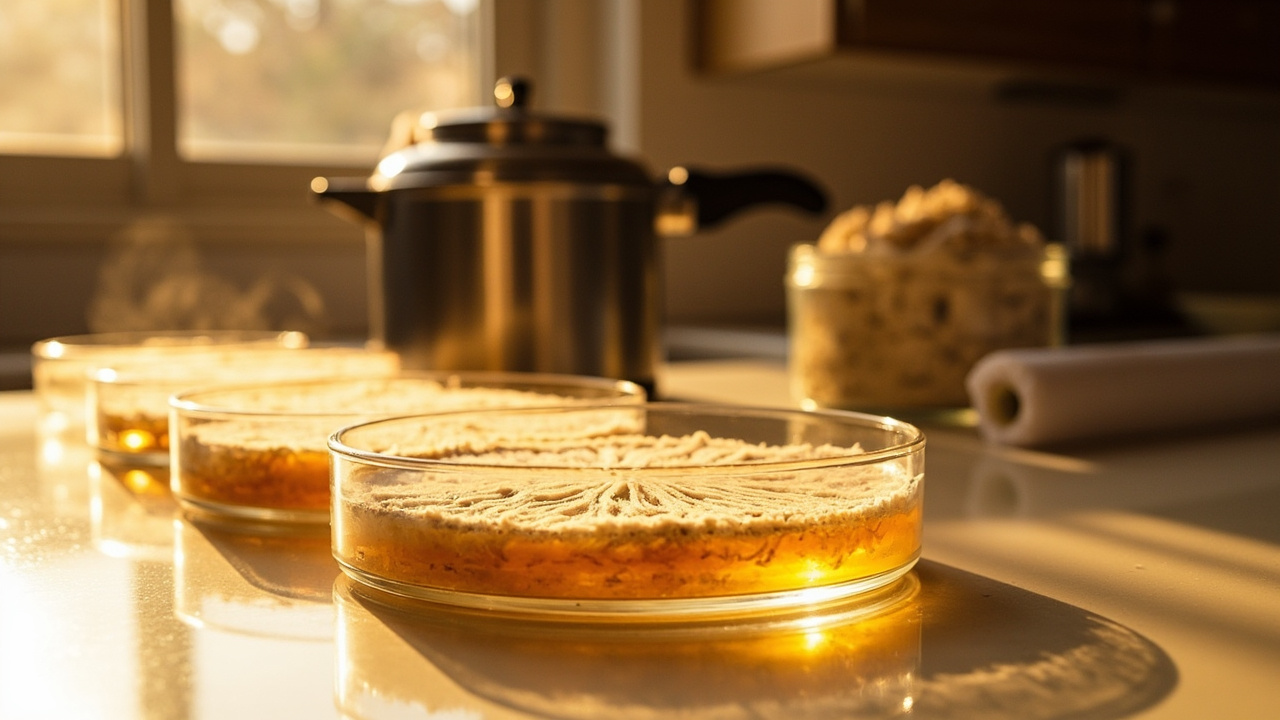
You’ve grown two or three gourmet mushroom kits successfully, and now you want to clone that oyster block you liked or germinate spores for a new shiitake strain. The next step is agar — a nutrient gel surface that lets you grow clean mycelium before moving it to grain or grow bags. The cost of getting it wrong is a fridge full of moldy plates, but the process itself is surprisingly kitchen-friendly: measure, sterilize, pour, seal. Here’s how to do it with a pressure cooker and a plastic tote.
Quick answer
Agar plates let you grow clean mycelium from spores or tissue before moving it to grain or substrate. This guide covers malt extract agar (MEA) and potato dextrose agar (PDA) recipes you can make at home with a pressure cooker — no lab autoclave required. You’ll measure ingredients, sterilize the mixture, pour plates in a still air box, and seal with parafilm. The whole process takes about two hours active time plus overnight cooling.
What this is (and is not)
What agar plates are
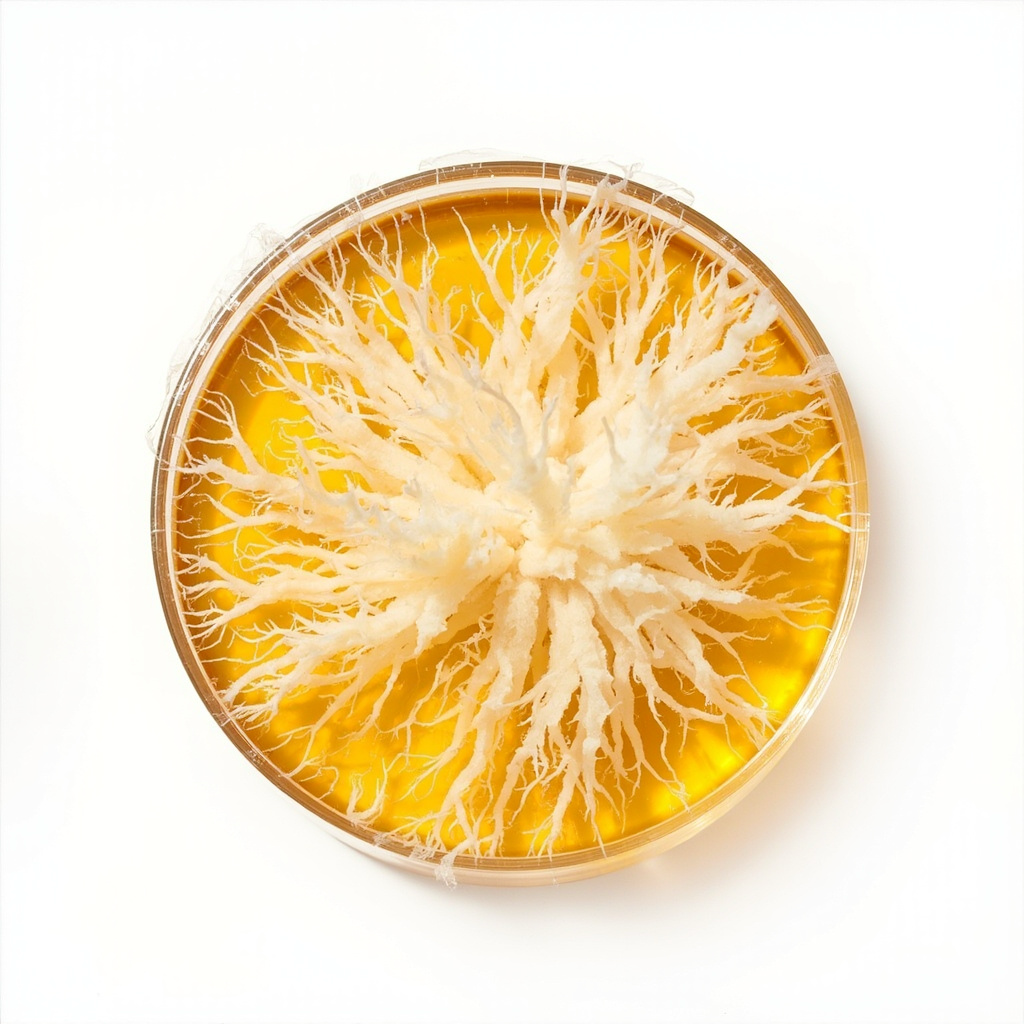
An agar plate is a shallow petri dish filled with a thin layer of nutrient gel — agar powder mixed with sugar and water. Mushroom spores or tissue land on that gel and grow into white, fluffy mycelium. Once the mycelium covers the plate, you transfer a wedge to grain or substrate to start the bulk grow. Think of it as a culture bank: a clean, isolated space where you can see exactly what’s growing before committing it to a full bag of grain.
What this guide is not
This guide covers agar preparation for gourmet and edible mushrooms only — oyster, shiitake, lion’s mane, king oyster, pioppino, and reishi. It does not cover actives, psilocybin, or psychedelic species.
It’s also not a monotub pipeline guide. Agar here serves kitchen-scale gourmet cultivation, not bulk actives grows. And it’s not a medical or clinical microbiology course — this is home kitchen technique for food-grade mushroom cultivation.
Who this is for (and when to skip agar)
If you’ve never grown mushrooms before
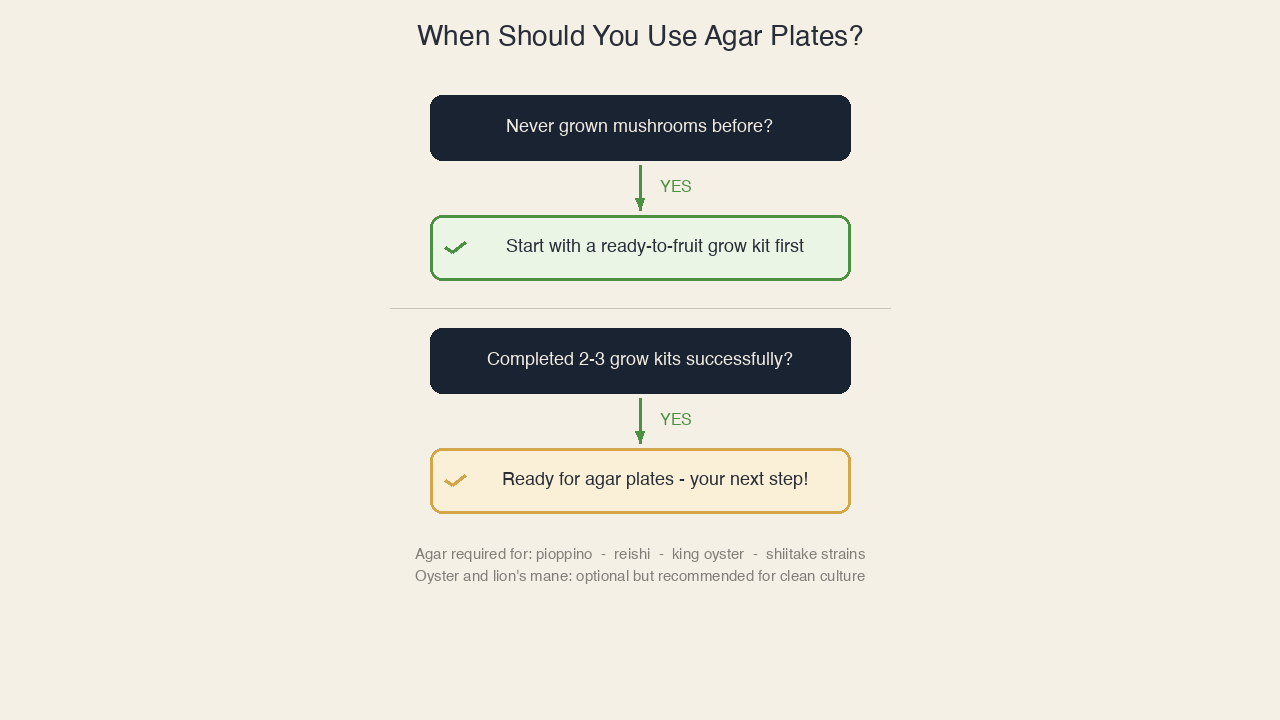
Skip agar for now. Start with a ready-to-fruit grow kit or learn how to choose a grow kit. Agar is the upgrade path for growers who have already succeeded with kits and want to move into spawn work. Jumping straight to agar before you’ve fruited a single block is like building a bakery before you’ve baked a loaf of bread.
If you’ve done 2-3 kits and want to level up
Agar is your next step. It lets you clone a mushroom you liked (tissue culture), germinate spores you collected, and build a clean culture library to inoculate grain jars or grow bags. You don’t need a lab — you need a pressure cooker, a plastic tote, and patience.
If you want to culture a specific gourmet species
Agar is required for species where pre-made spawn isn’t available — pioppino, reishi, king oyster, and many shiitake strains. Oyster is the fastest colonizer on agar and a great practice species. Lion’s mane tissue clones easily on MEA. If you’re working with spores rather than live culture, agar is the only way to germinate them cleanly.
What you’ll need
Ingredients (makes about 20 plates)
The simplest path is dehydrated MEA — just add water and sterilize. One 100g jar makes roughly 100 plates. If you want to mix from scratch, the standard MEA recipe is 10g agar powder, 10g light malt extract, and 500ml distilled water.
For PDA (potato dextrose agar): boil 200g of peeled potatoes in 500ml water for 30 minutes, strain the broth, add 10g agar and 10g dextrose or glucose, then top up to 500ml.
Equipment
- Pressure cooker or canner: must reach 15 PSI. The Presto 23-quart is the home standard — big enough for agar flasks and grain jars alike.
- Petri dishes: 90mm or 100mm. Disposable sterile plastic works; glass works if you dishwasher-clean and alcohol-wipe them.
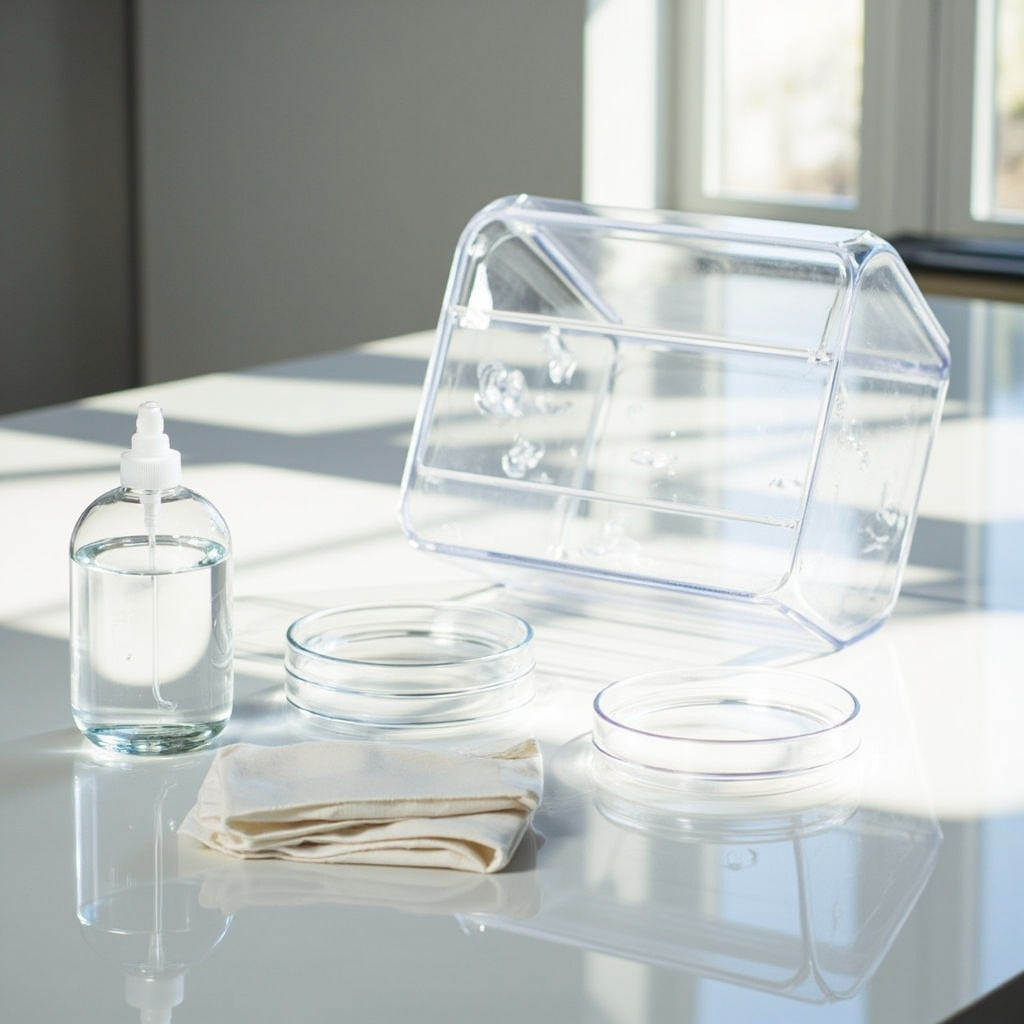
- Still air box: a purpose-built SAB or a clear plastic tote turned on its side. This is your contamination barrier.
- Parafilm or lab film: for sealing plates after pouring. A parafilm roll stretches to seal dozens of plates.
- Inoculation loop: for spore streaking or tissue transfer. A CryoKing reusable loop set with 2 rods and 90 replaceable tips lasts indefinitely.
Skip-the-pour option
If you’d rather practice transfer technique before learning to pour, start with pre-poured MEA plates. They cost more per plate but eliminate the pour-contamination risk entirely — a smart move for your first few attempts.
Before you start: clean your workspace
Do this first — contamination on bare agar is unforgiving. Unlike a grow kit where the substrate is already colonized and resistant, bare agar is a nutrient free-for-all. Any mold spore that lands on your plate will outcompete your mushroom mycelium.
Sanitize everything
- Spray your still air box interior with 70% isopropyl alcohol and wipe dry
- Spray your work surface, your hands, and all tools
- Turn off fans, close windows, and wait 10-15 minutes for airborne particles to settle
- Wear gloves and a clean long-sleeve shirt
Why a still air box (not a laminar flow hood)
A laminar flow hood pushes HEPA-filtered air across your workspace — ideal but a $400-800 investment. A still air box simply creates a calm zone where turbulence is minimized. For pour-plate technique at home, that’s sufficient. If your contamination rate stays above 20% after improving SAB technique, then consider upgrading. See the contamination overview for why contamination prevention is the most important factor in agar success.
Step-by-step: measure, sterilize, pour, store
Step 1: Measure and mix
Weigh out your ingredients — dehydrated MEA or a from-scratch recipe. Combine with distilled water in a flask or jar. Stir thoroughly. Agar won’t dissolve in cold water, but don’t heat it yet — that comes in the pressure cooker.
Step 2: Sterilize in the pressure cooker
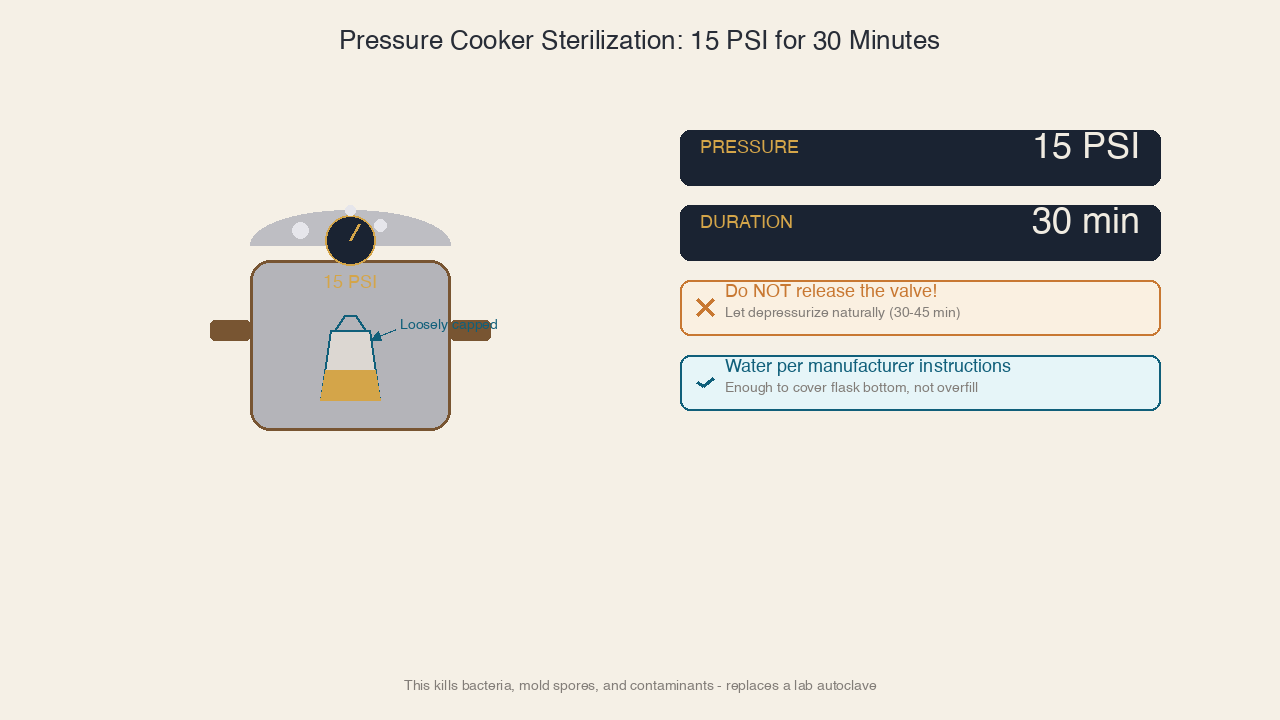
Loosely cap your flask with foil or a cotton plug — never tight, because pressure must escape. Load it into the pressure cooker with water per manufacturer instructions.
Run at 15 PSI for 30 minutes. This kills bacteria, mold spores, and most contaminants that would otherwise colonize your plates.
Turn off heat and let it depressurize naturally. Do not release the valve — rapid depressurization causes the agar to boil over and flood your cooker. Wait 30-45 minutes.
Step 3: Pour the plates (in your still air box)
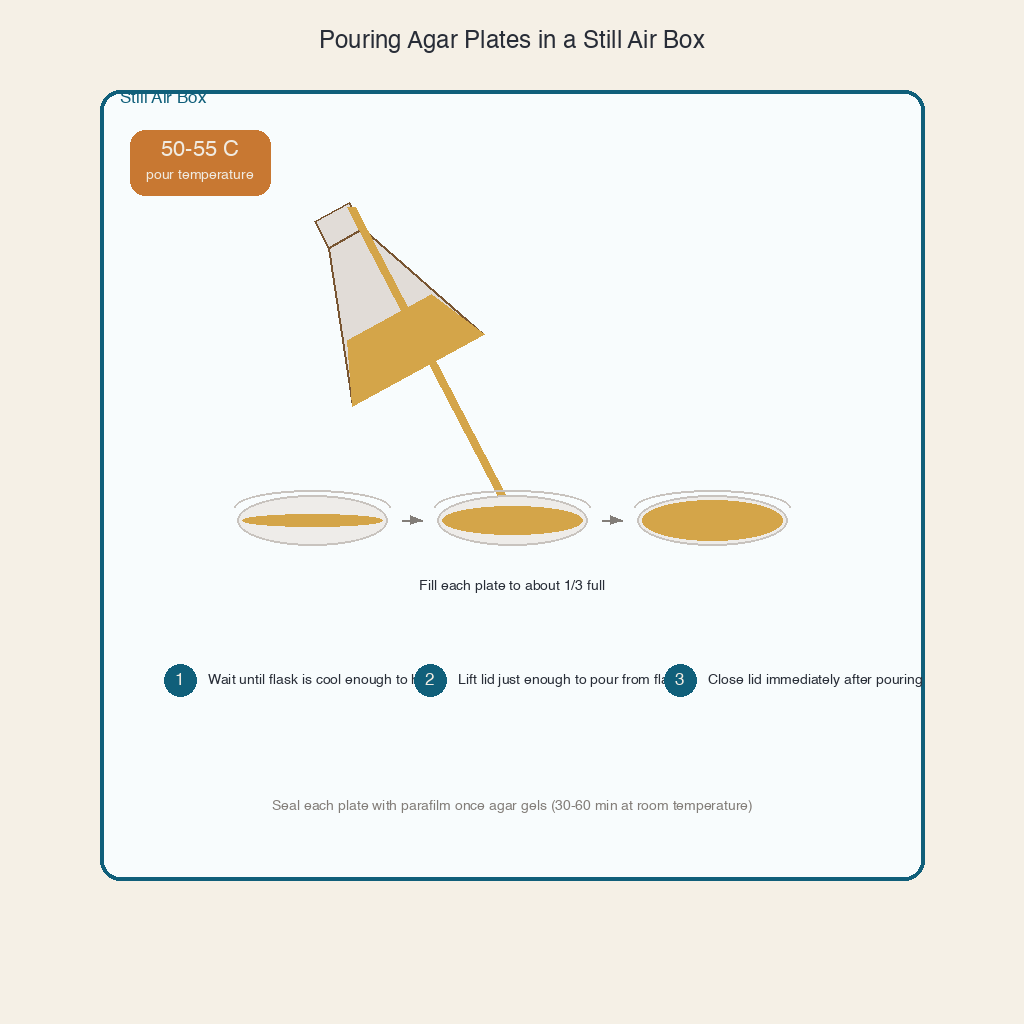
Wait until the flask is cool enough to hold but still liquid — around 50-55°C (122-131°F). Too hot: condensation floods the plate lid. Too cool: agar gels in the flask and you can’t pour it.
Work inside your still air box. Lift each petri dish lid just enough to pour, fill to about one-third full, and close immediately. Pour 15-25 plates per 500ml batch. Seal each plate with parafilm once the agar gels (30-60 minutes at room temperature).
Step 4: Seal and store
Stack plates upside down (lid on bottom) to prevent condensation from pooling on the agar surface. Store in the fridge at 4°C (39°F) in a sealed container or zip bag. Shelf life is 2-4 weeks refrigerated — use within 30 days for best results.
Inoculation: transferring culture to plates
Spore transfer (germination)
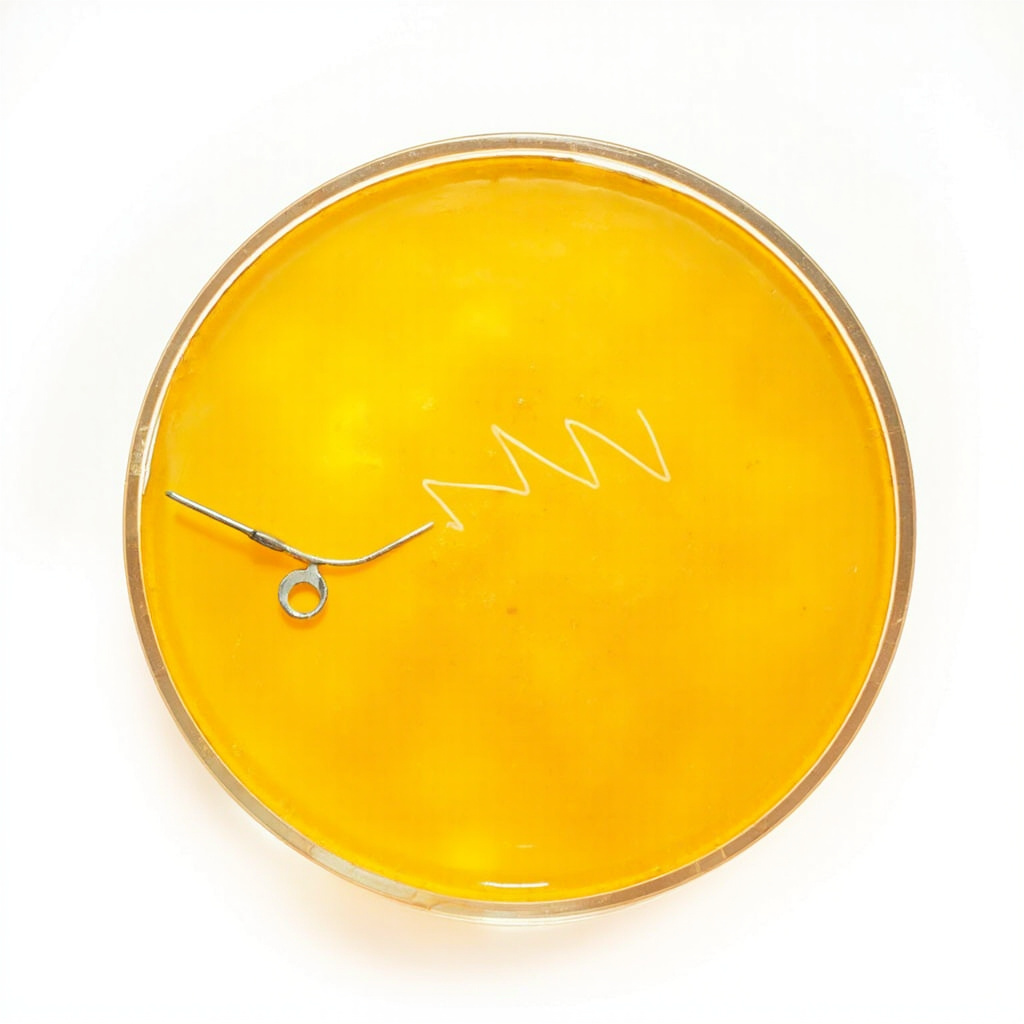
Flame your inoculation loop until red-hot, then let it cool for 5 seconds. Touch the spore print or scrape spores from a syringe. Streak a zigzag pattern across the agar surface. Seal with parafilm and incubate at species-appropriate temperature.
Tissue cloning (from a fresh mushroom)
Split a fresh mushroom stem or cap interior open with sterile fingers — don’t cut the surface, cut to expose clean interior tissue. Flame-loop a small piece of interior tissue and place it on the agar. This is how you replicate a mushroom you liked: the clone carries the same genetics as the parent.
Incubation and checking for contamination
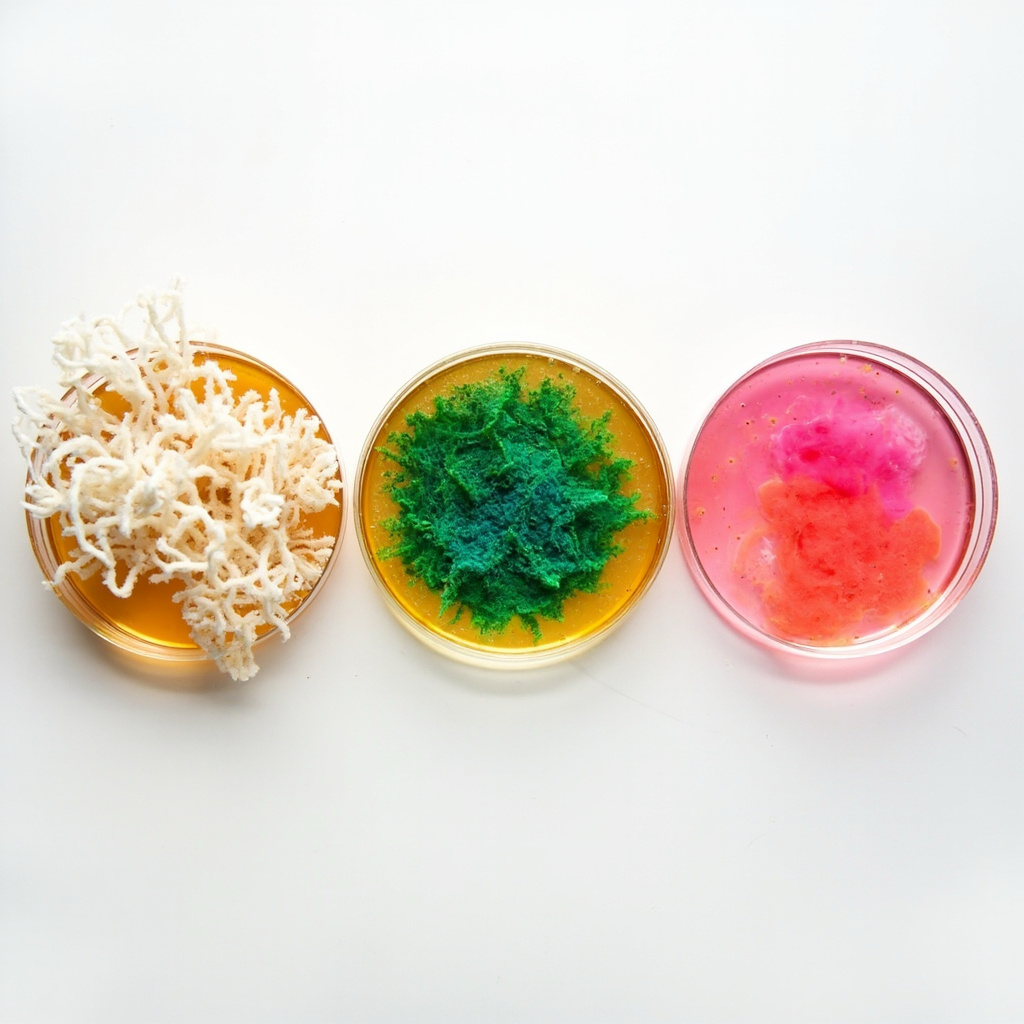
Incubate plates at 20-24°C (68-75°F) for most gourmet species. Check daily: healthy mycelium is white and fluffy. Contamination shows as green patches (Trichoderma), pink, yellow, or fuzzy gray spots. Discard contaminated plates immediately — don’t try to transfer from them.
Choosing your recipe: MEA vs PDA vs alternatives
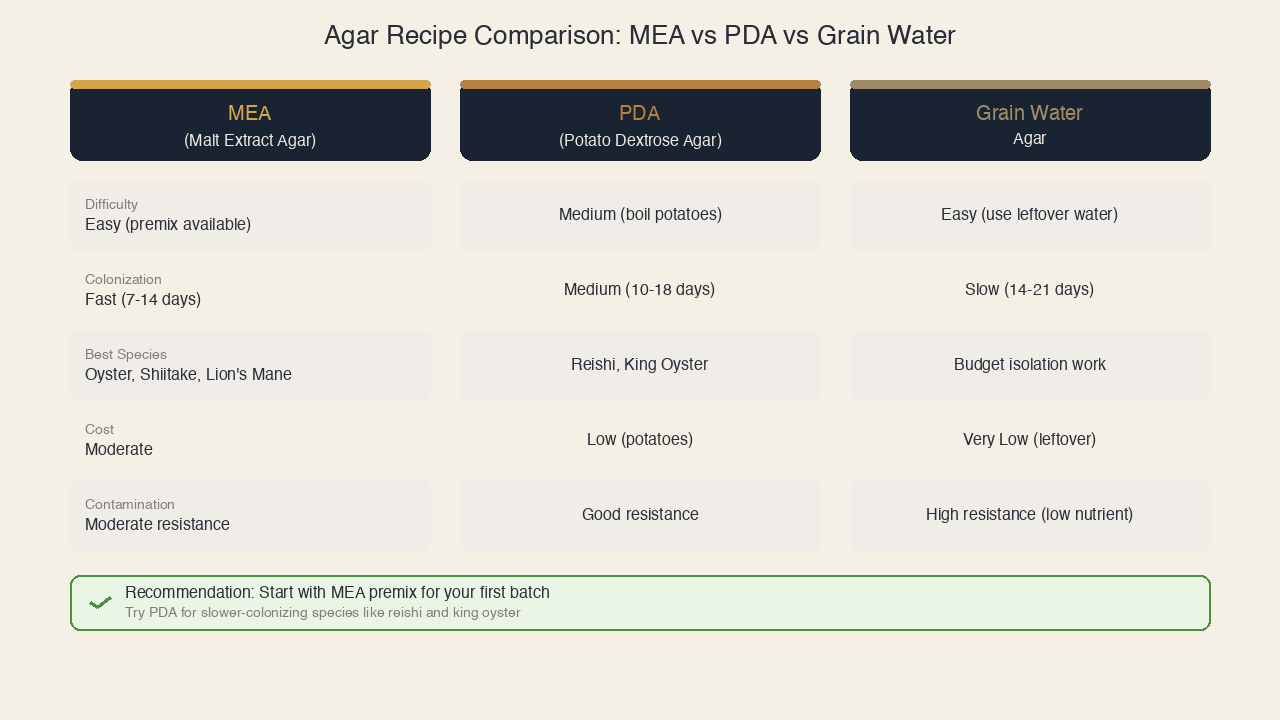
Malt Extract Agar (MEA) — the default
Best all-around recipe for oyster, shiitake, and lion’s mane. Fast colonization (7-14 days visible growth) and a mild nutrient level that doesn’t overfeed fast-growing contaminants. An MEA dehydrated powder takes the guesswork out of weighing.
Potato Dextrose Agar (PDA) — the classic
A slightly different nutrient profile; some species colonize faster on PDA. Good for reishi and king oyster. More involved prep (boil potatoes, strain broth) but worth it if you’re working with slower species.
Grain water agar — the budget option
Use leftover grain soak water plus agar powder. Lower nutrient means slower growth but also slower contamination — handy for isolating clean sectors from a dirty culture.
Pre-poured plates (skip the pour entirely)
If you don’t want to pour your own, pre-poured MEA plates eliminate the pour step. More expensive per plate, but the best option for first-timers practicing transfer technique.
Contamination watch
What to watch for
- Green patches: Trichoderma — see the green mold guide for diagnosis and response
- White cobwebby growth that’s not your target species: could be cobweb mold or just fast mycelium — compare against the contamination overview
- Slimy or wet spots: bacterial contamination, usually from insufficient sterilization or poor SAB technique
What to do when a plate contaminates
Seal it and throw it away. Don’t try to rescue a contaminated plate by transferring from it — you’ll carry the contamination to your clean plates. One contaminated plate near clean plates can spread spores, so isolate immediately. See the contamination overview for the full decision framework.
Common mistakes
1. Pouring agar too hot
Condensation floods the plate lid and pools on the agar surface, creating bacterial highways. Wait until the flask is comfortable to hold (about 50-55°C) before pouring.
2. Opening the pressure cooker valve too fast
Rapid depressurization causes the agar liquid to boil over, flooding the cooker and ruining your batch. Turn off heat and walk away — let it depressurize naturally (30-45 minutes).
3. Skipping the still air box
Every plate grows random mold within 48 hours because you poured in open air. Always pour inside a still air box, even if it’s just a plastic tote on its side.
4. Storing plates right-side up
Condensation drips from the lid onto the agar surface, creating wet spots where bacteria thrive. Once gelled, flip plates upside down (lid on bottom) for storage.
5. Reusing a loop between transfers without flaming
Cross-contamination between plates — you carry bacteria or mold from one plate to the next. Flame the loop to red-hot between every single transfer.
Related methods and species
- How Grow Kits Work — the kit-first path; start here if you’re new
- Grow Bags After Your First Kit — where clean agar culture goes next
- Fruiting Conditions — what happens after your agar-cultured spawn colonizes a substrate
- Oyster Mushrooms — fastest-growing species on agar
- Lion’s Mane — tissue clones easily on MEA
- Shiitake — agar is how you maintain clean shiitake culture
- First Grow Kit — if you haven’t grown anything yet, start here
Key takeaways
- Agar plates are the culture-bank step between spores or tissue and bulk substrate — for gourmet mushrooms only
- MEA premix is the easiest starting recipe; PDA is the classic alternative for slower species
- A pressure cooker at 15 PSI for 30 minutes replaces a lab autoclave
- A still air box is the minimum contamination barrier — pour inside it, always
- Store poured plates upside down, sealed with parafilm, refrigerated, and use within 30 days
- If you’ve never grown mushrooms, start with a kit — agar is the upgrade path, not the entry point
- Contaminated plates go in the trash, not the transfer queue — see the contamination overview